Lead optimization of monoclonal antibody to meet target product profile#
Introduction#
Advancing and optimizing leads for improved safety and efficacy is the key focus of preclinical drug development. For example, optimizing for binding affinity is a critical aspect of the monoclonal antibody development process, but engineering monoclonal antibodies of low picomolar (pM) range is often challenging when using standard protein engineering techniques.
In this walkthrough, we’ll explore how to use machine learning to further refine and improve monoclonal variant libraries with binders in the high picomolar range. OpenProtein.AI tools allow us to select and prioritize variants, reducing the resources and time needed to iterate through different monoclonal antibody designs.
If you want to explore your own data, you can adjust the process described in this walkthrough to experiment with reducing aggregation or clumping of the monoclonal antibody, or increase its specificity.
What you need before getting started#
To leverage Optimization and Prediction Models (OP Models), it’s important to have a training dataset specific to your application. We generally recommend the following:
A library size that contains approximately 30 variants or more. It’s possible to use smaller libraries, but you’ll generally want to review the cross-validation results of your model.
Semi-quantitative or quantitative binding data or measurements on properties of interest. Assays to consider are surface plasmon resonance (SPR), biolayer interferometry (BLI) or enzyme-linked immunosorbent assay (ELISA). This data should be in triplicate to reduce noise contribution from assay.
Libraries should preferably have mutations across more than 1 site and of different types if possible. For example, alanine scanning can be complemented with substitution of other amino acids at specific sites.
Demo-ing OpenProtein.AI’s Optimization and Prediction Models#
Uploading our data#
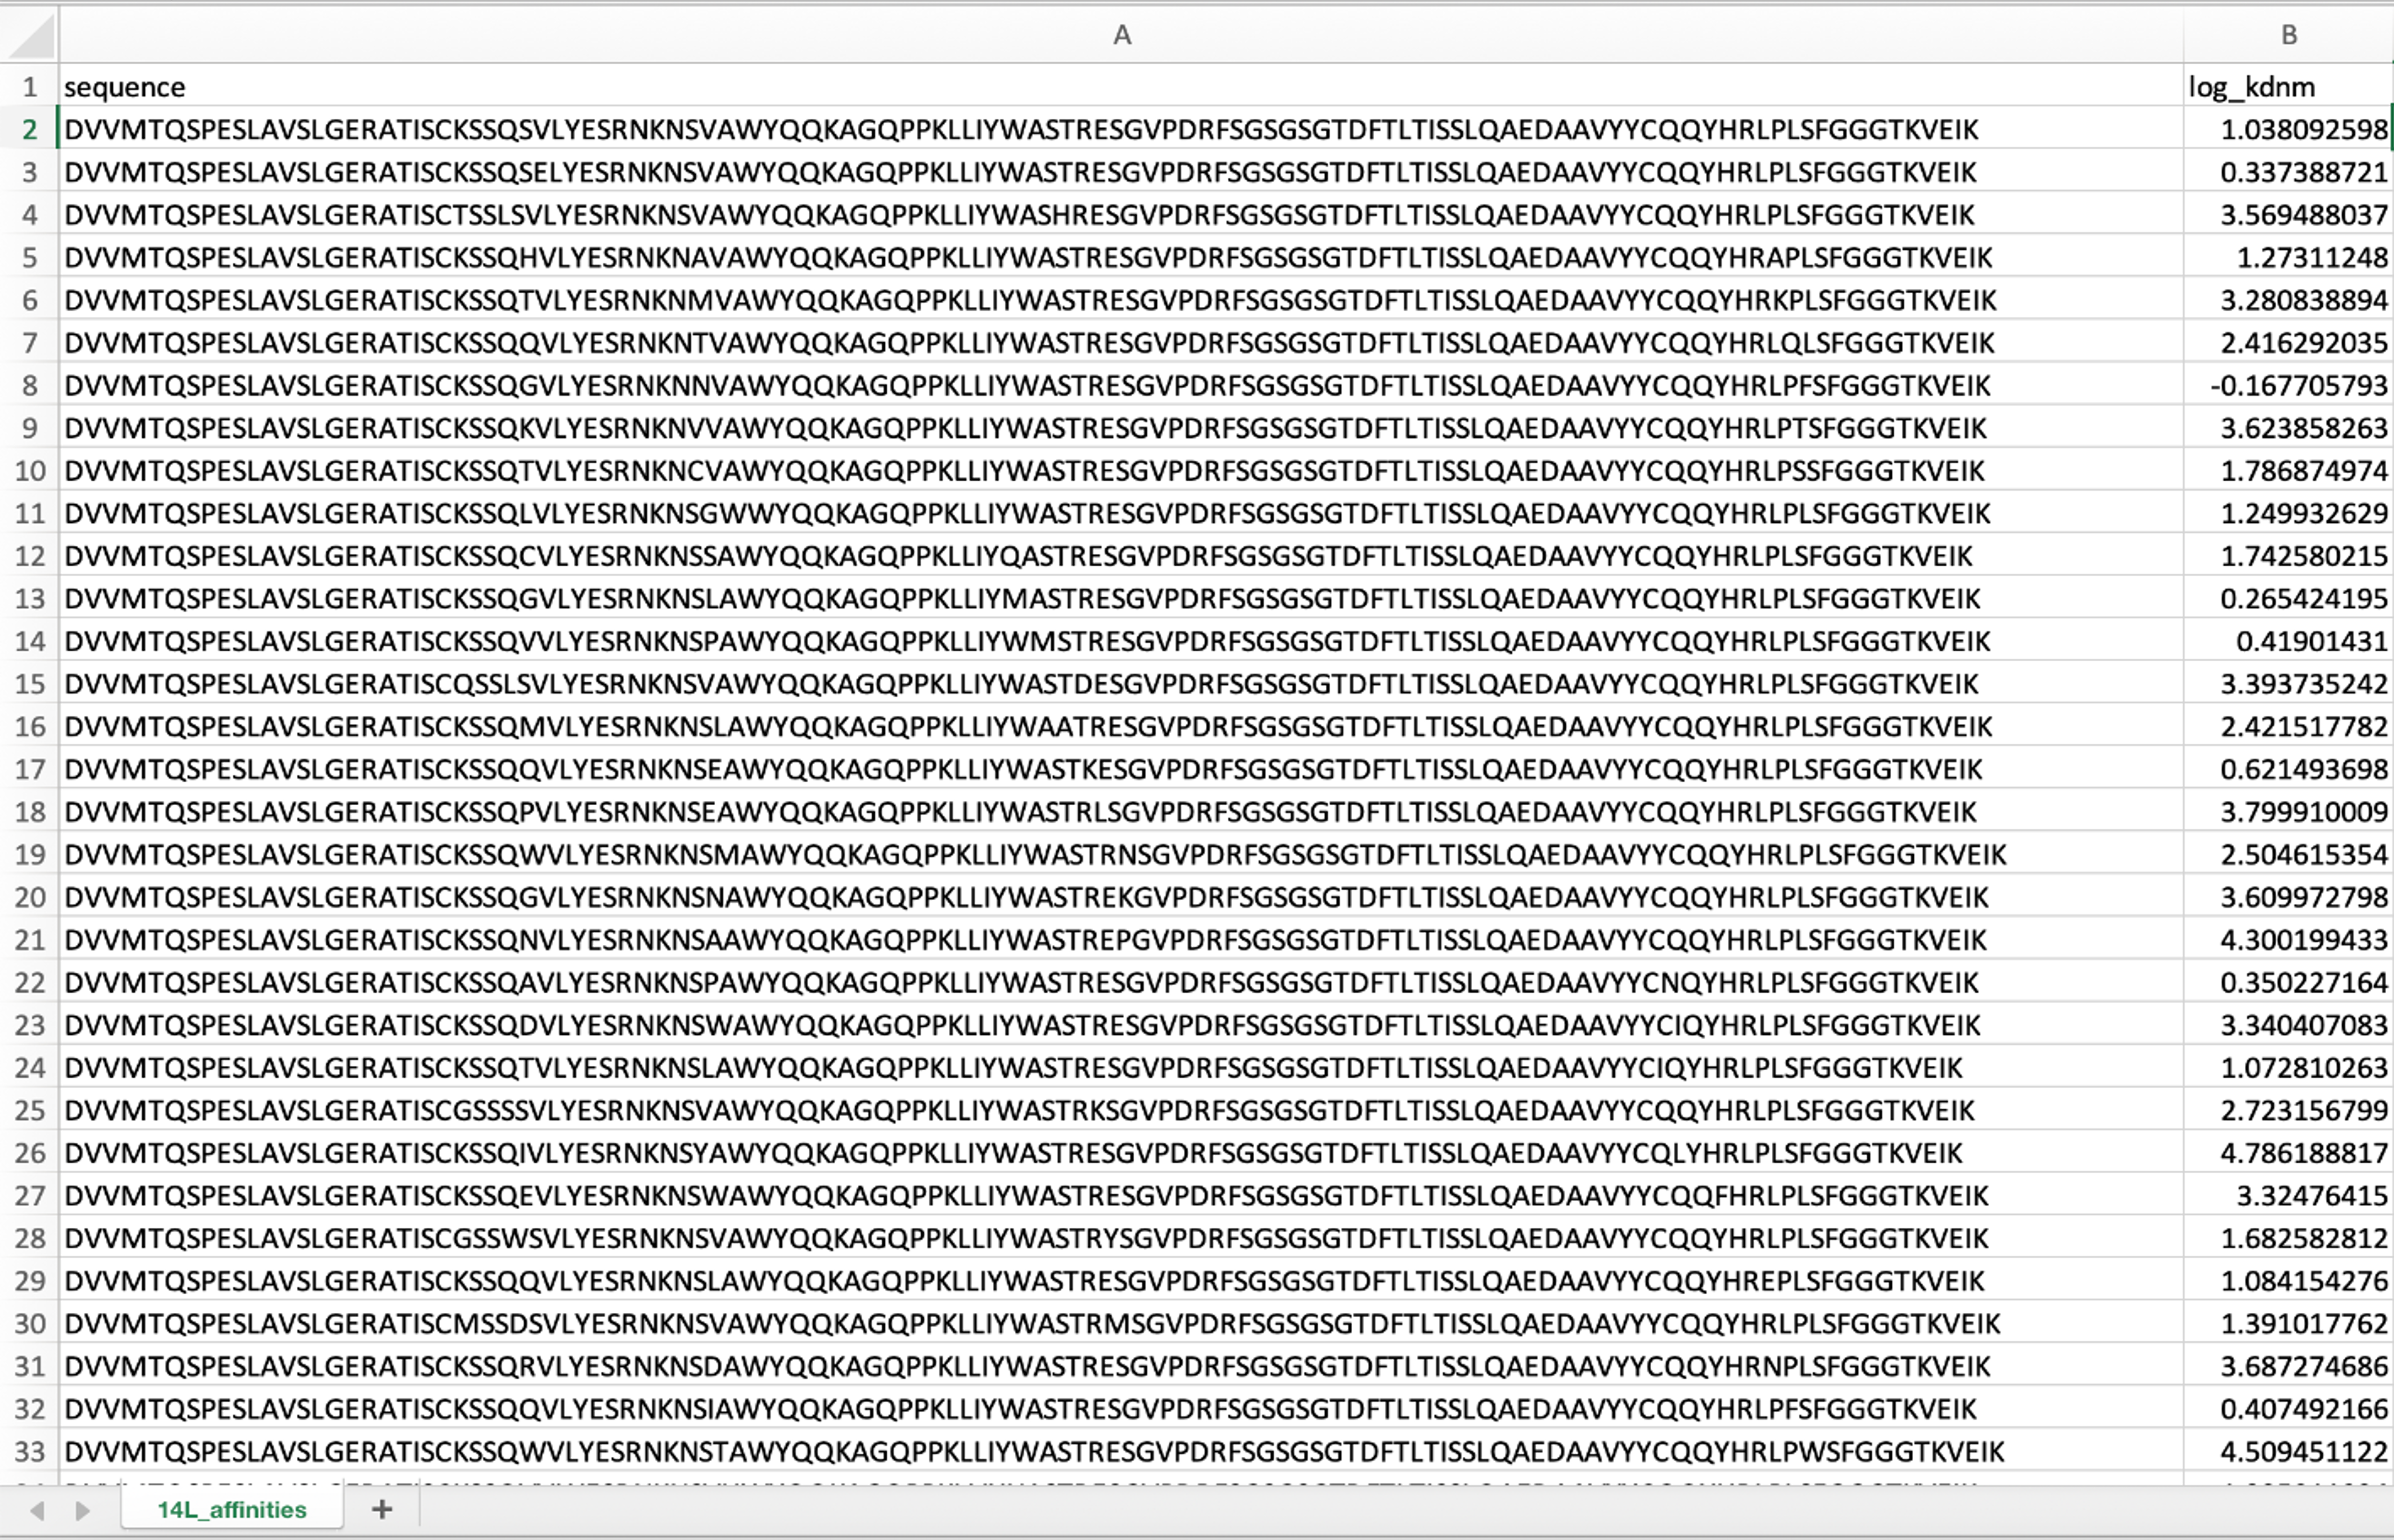
In this walkthrough, we will be using the dataset found in “Machine learning optimization of candidate antibody yields highly diverse sub-nanomolar affinity antibody libraries”, Lin Li et al 2023, specifically the 14L variant library data shown here. This library was generated using phage display, which is a common way to generate antibody libraries to look for high affinity binders. OP Models can work with data generated through phage display, yeast display, ribosome display or mammalian cell display libraries as well as clones isolated from naive or immune mice models.
We can directly use this dataset that has been formatted and ready for upload. You can download it here.
In this dataset, the binding affinity of the antibody was measured and determined using an engineered yeast mating-based assay as described in the paper “Machine learning optimization of candidate antibody yields highly diverse sub-nanomolar affinity antibody libraries” by Li et al. (2022). We are optimizing the equilibrium dissociation constant (Kd) to perform lead optimization for better binders, specifically the property measured in the dataset is the log of the Kd. The best binder in the original library has a Kd of 29 pM. This is already a high affinity binder, but it is possible to engineer even higher affinity using the OpenProtein.AI platform.
If you wish to use your own data, ensure that the dataset is formatted as a CSV table with columns containing the full sequence of each variant and their measurement values. For more information, visit Uploading your data.
For this walkthrough, we will focus on a single property. Our dataset has complete measurements for all variants, but the OpenProtein.AI platform can also work with datasets where some variants are missing measurements.
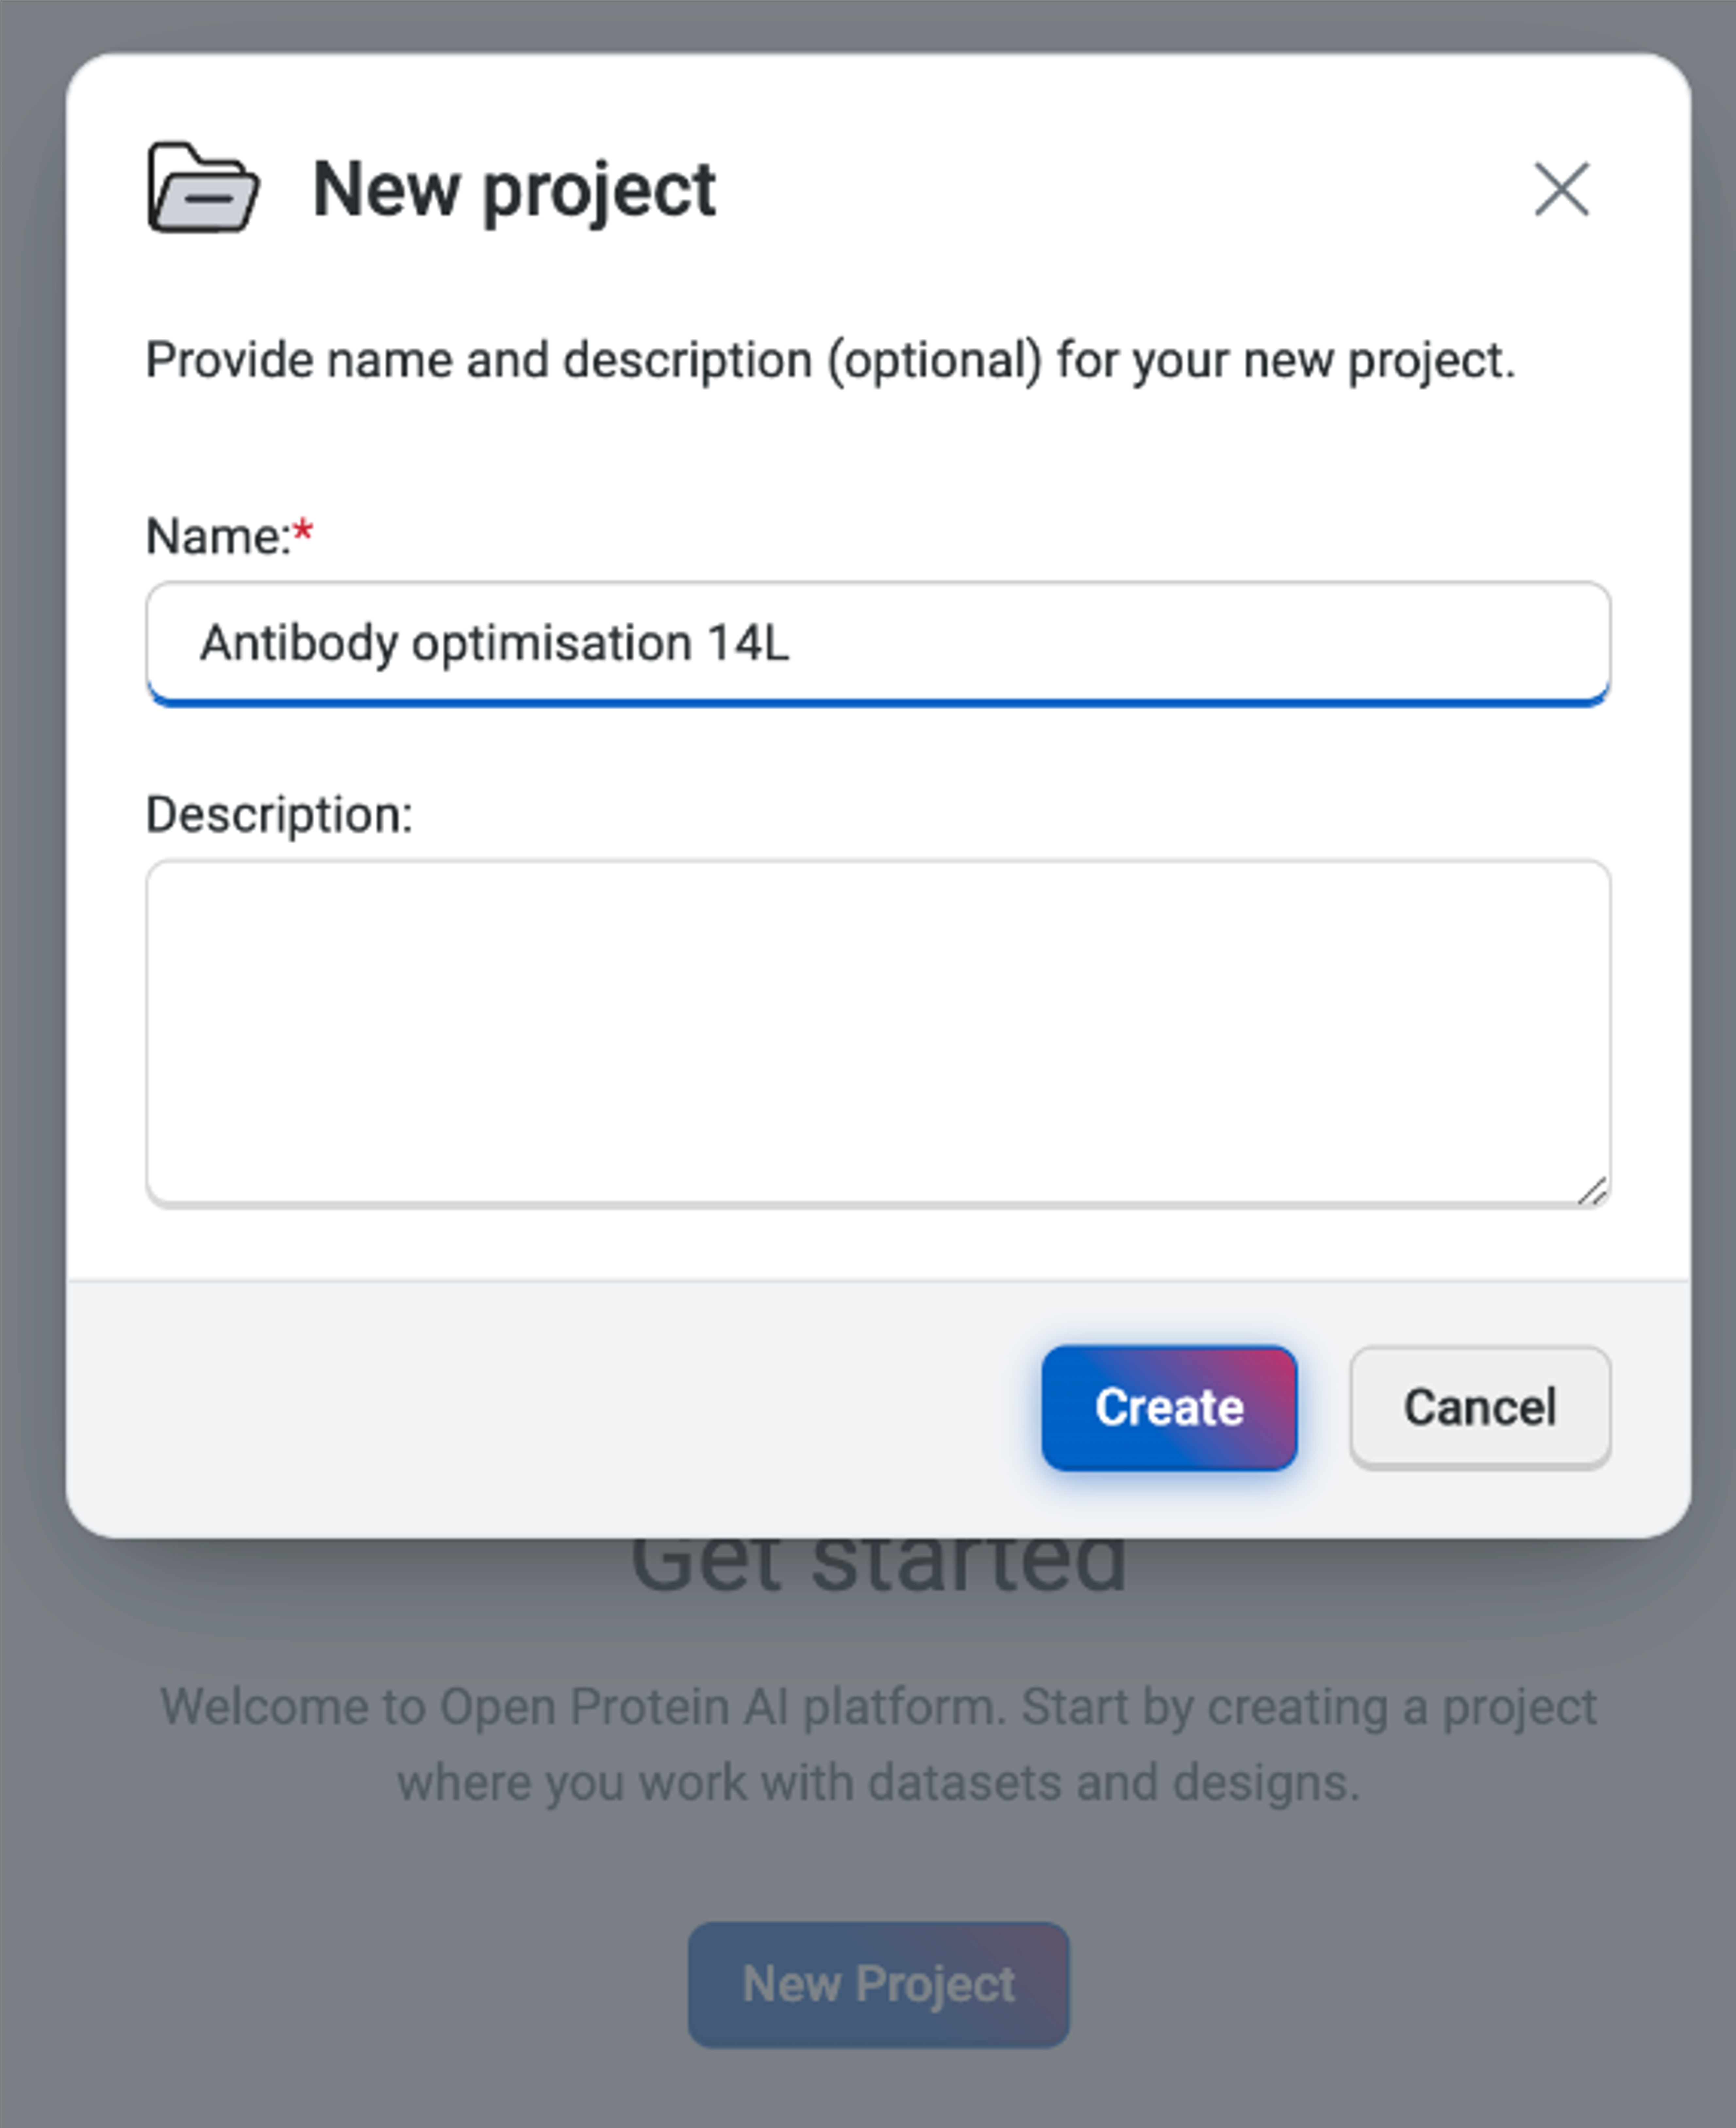
To begin, we will create a project in OP models by selecting New Project and naming it project “Antibody optimization 14L”.
We then upload the 14L dataset by selecting Upload dataset and navigating to the CSV file in the file explorer. The platform will automatically generate the data categories, but it’s important to ensure that the OpenProtein.AI platform has captured the correct names and column types. Here, we have the sequence displayed as Sequence and the log_kdnm as Property as we would have wanted. We should also verify that there are no invalid values found in the dataset or we will need to reformat the CSV file as per Uploading your data.

Our data is now ready for use.
Upon successful upload, the system will automatically perform preprocessing as well as queue up a Uniform Manifold Approximation and Projection (UMAP) job for visualization.
Visualizing our data#
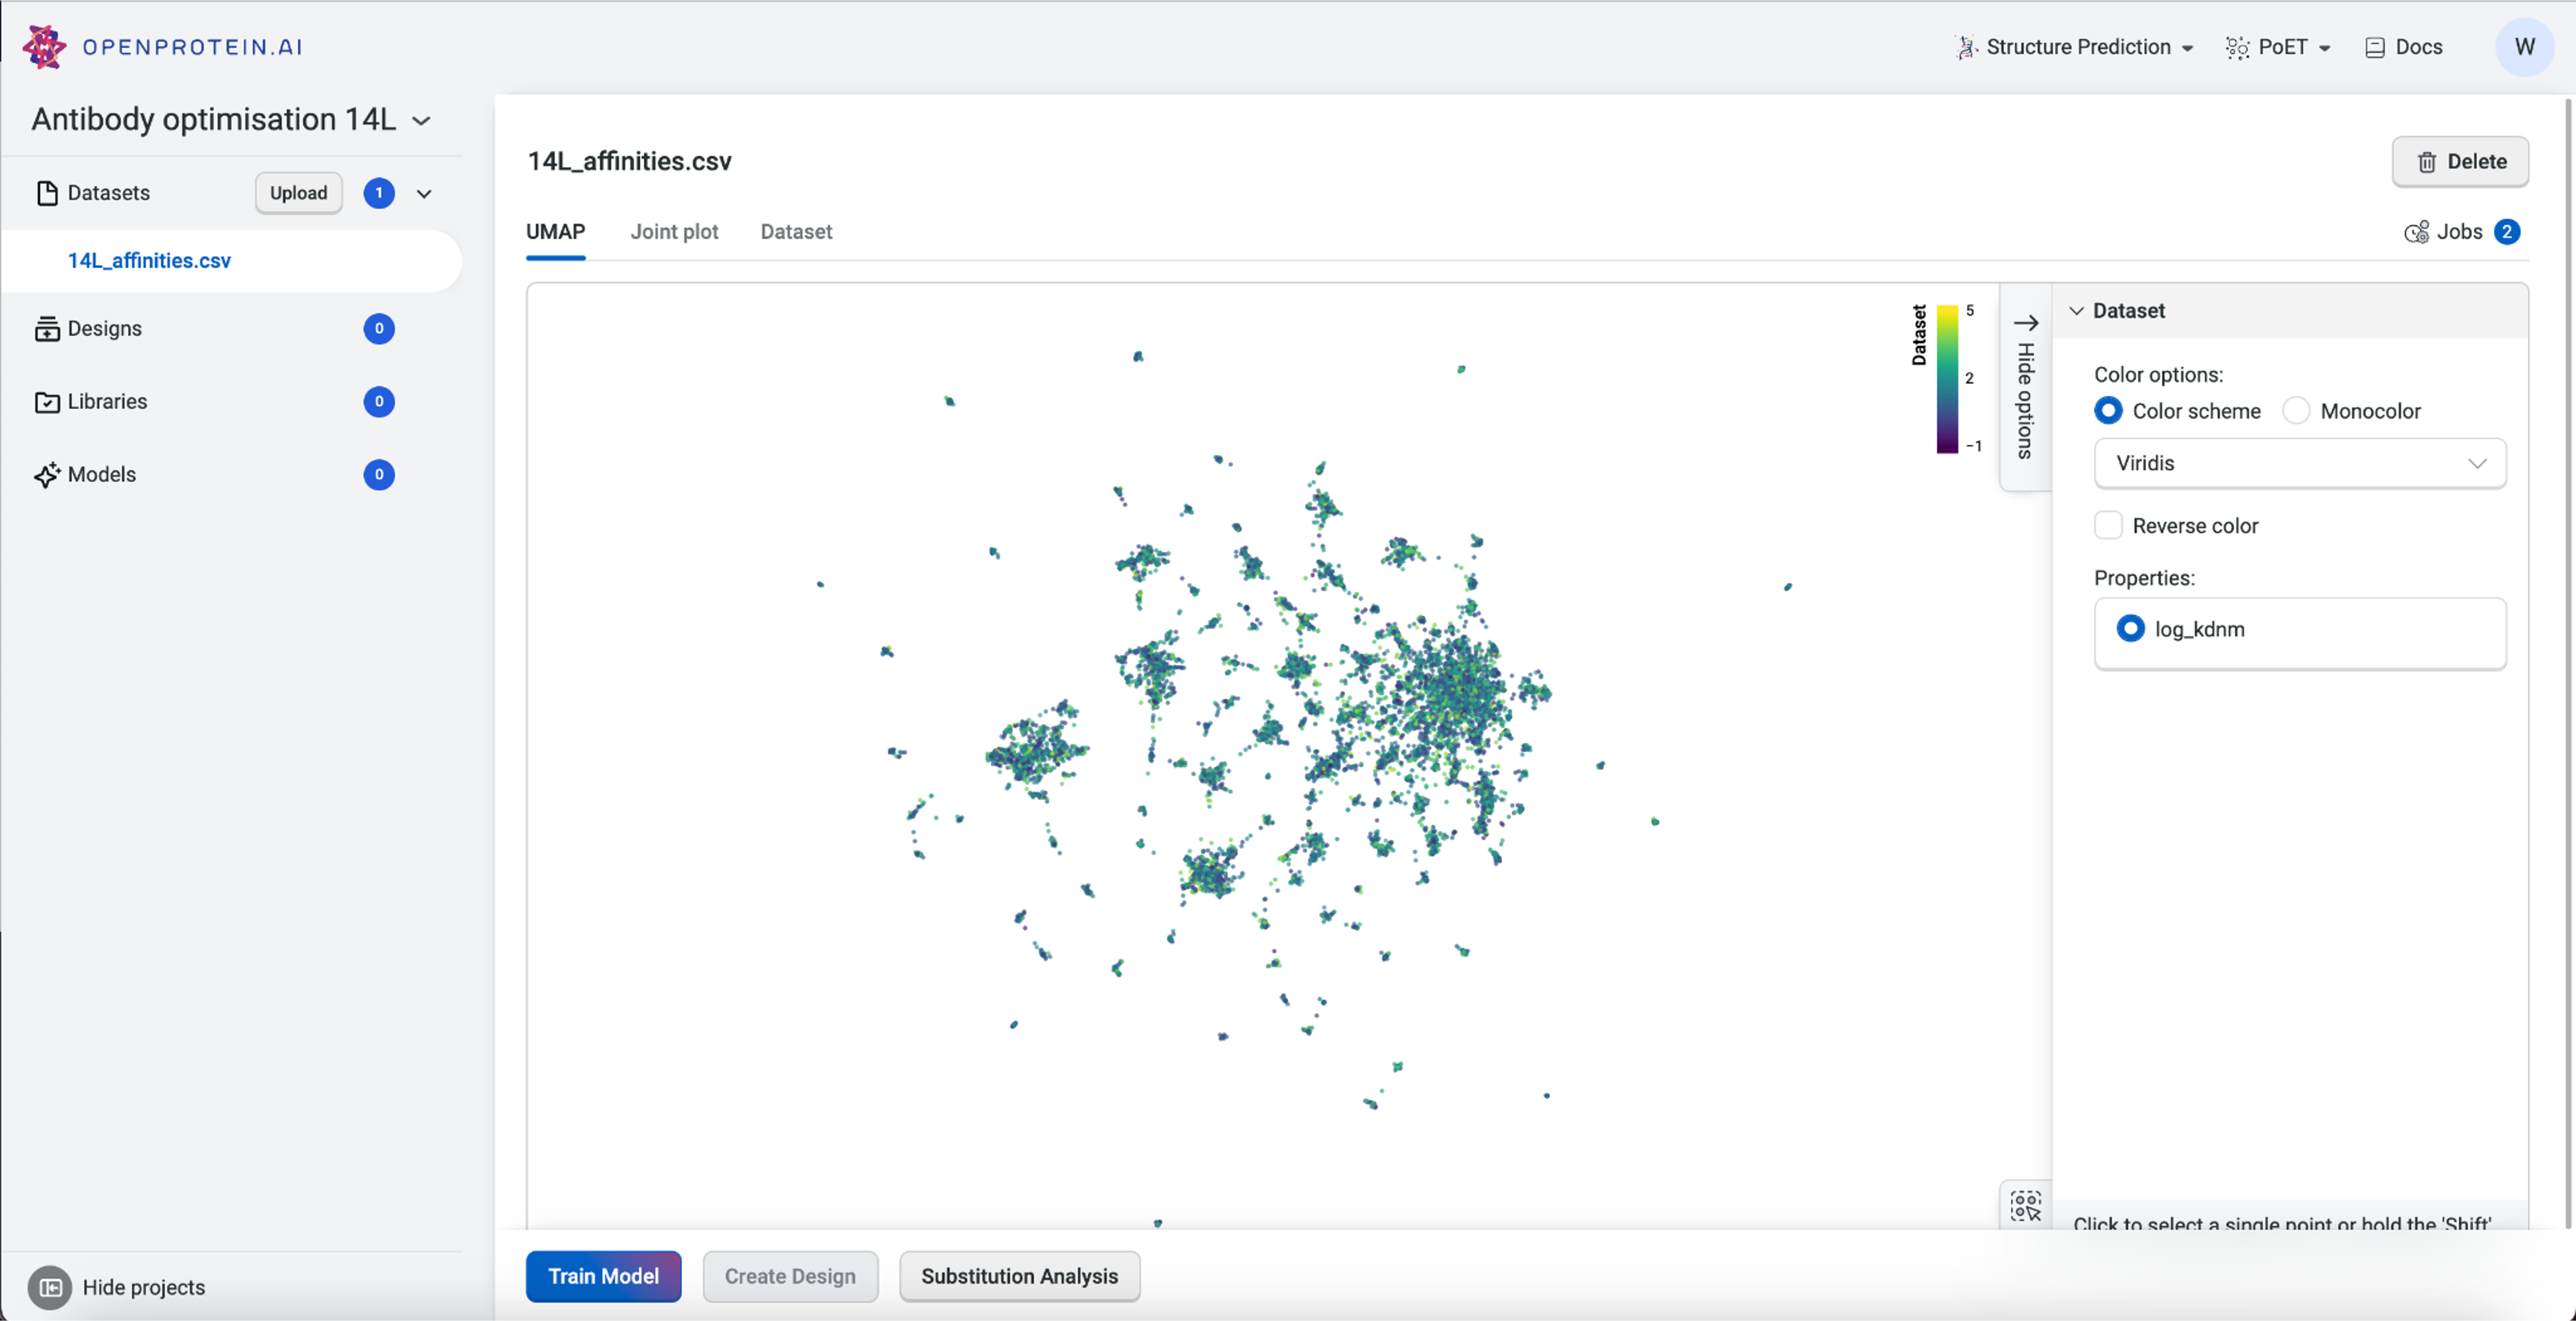
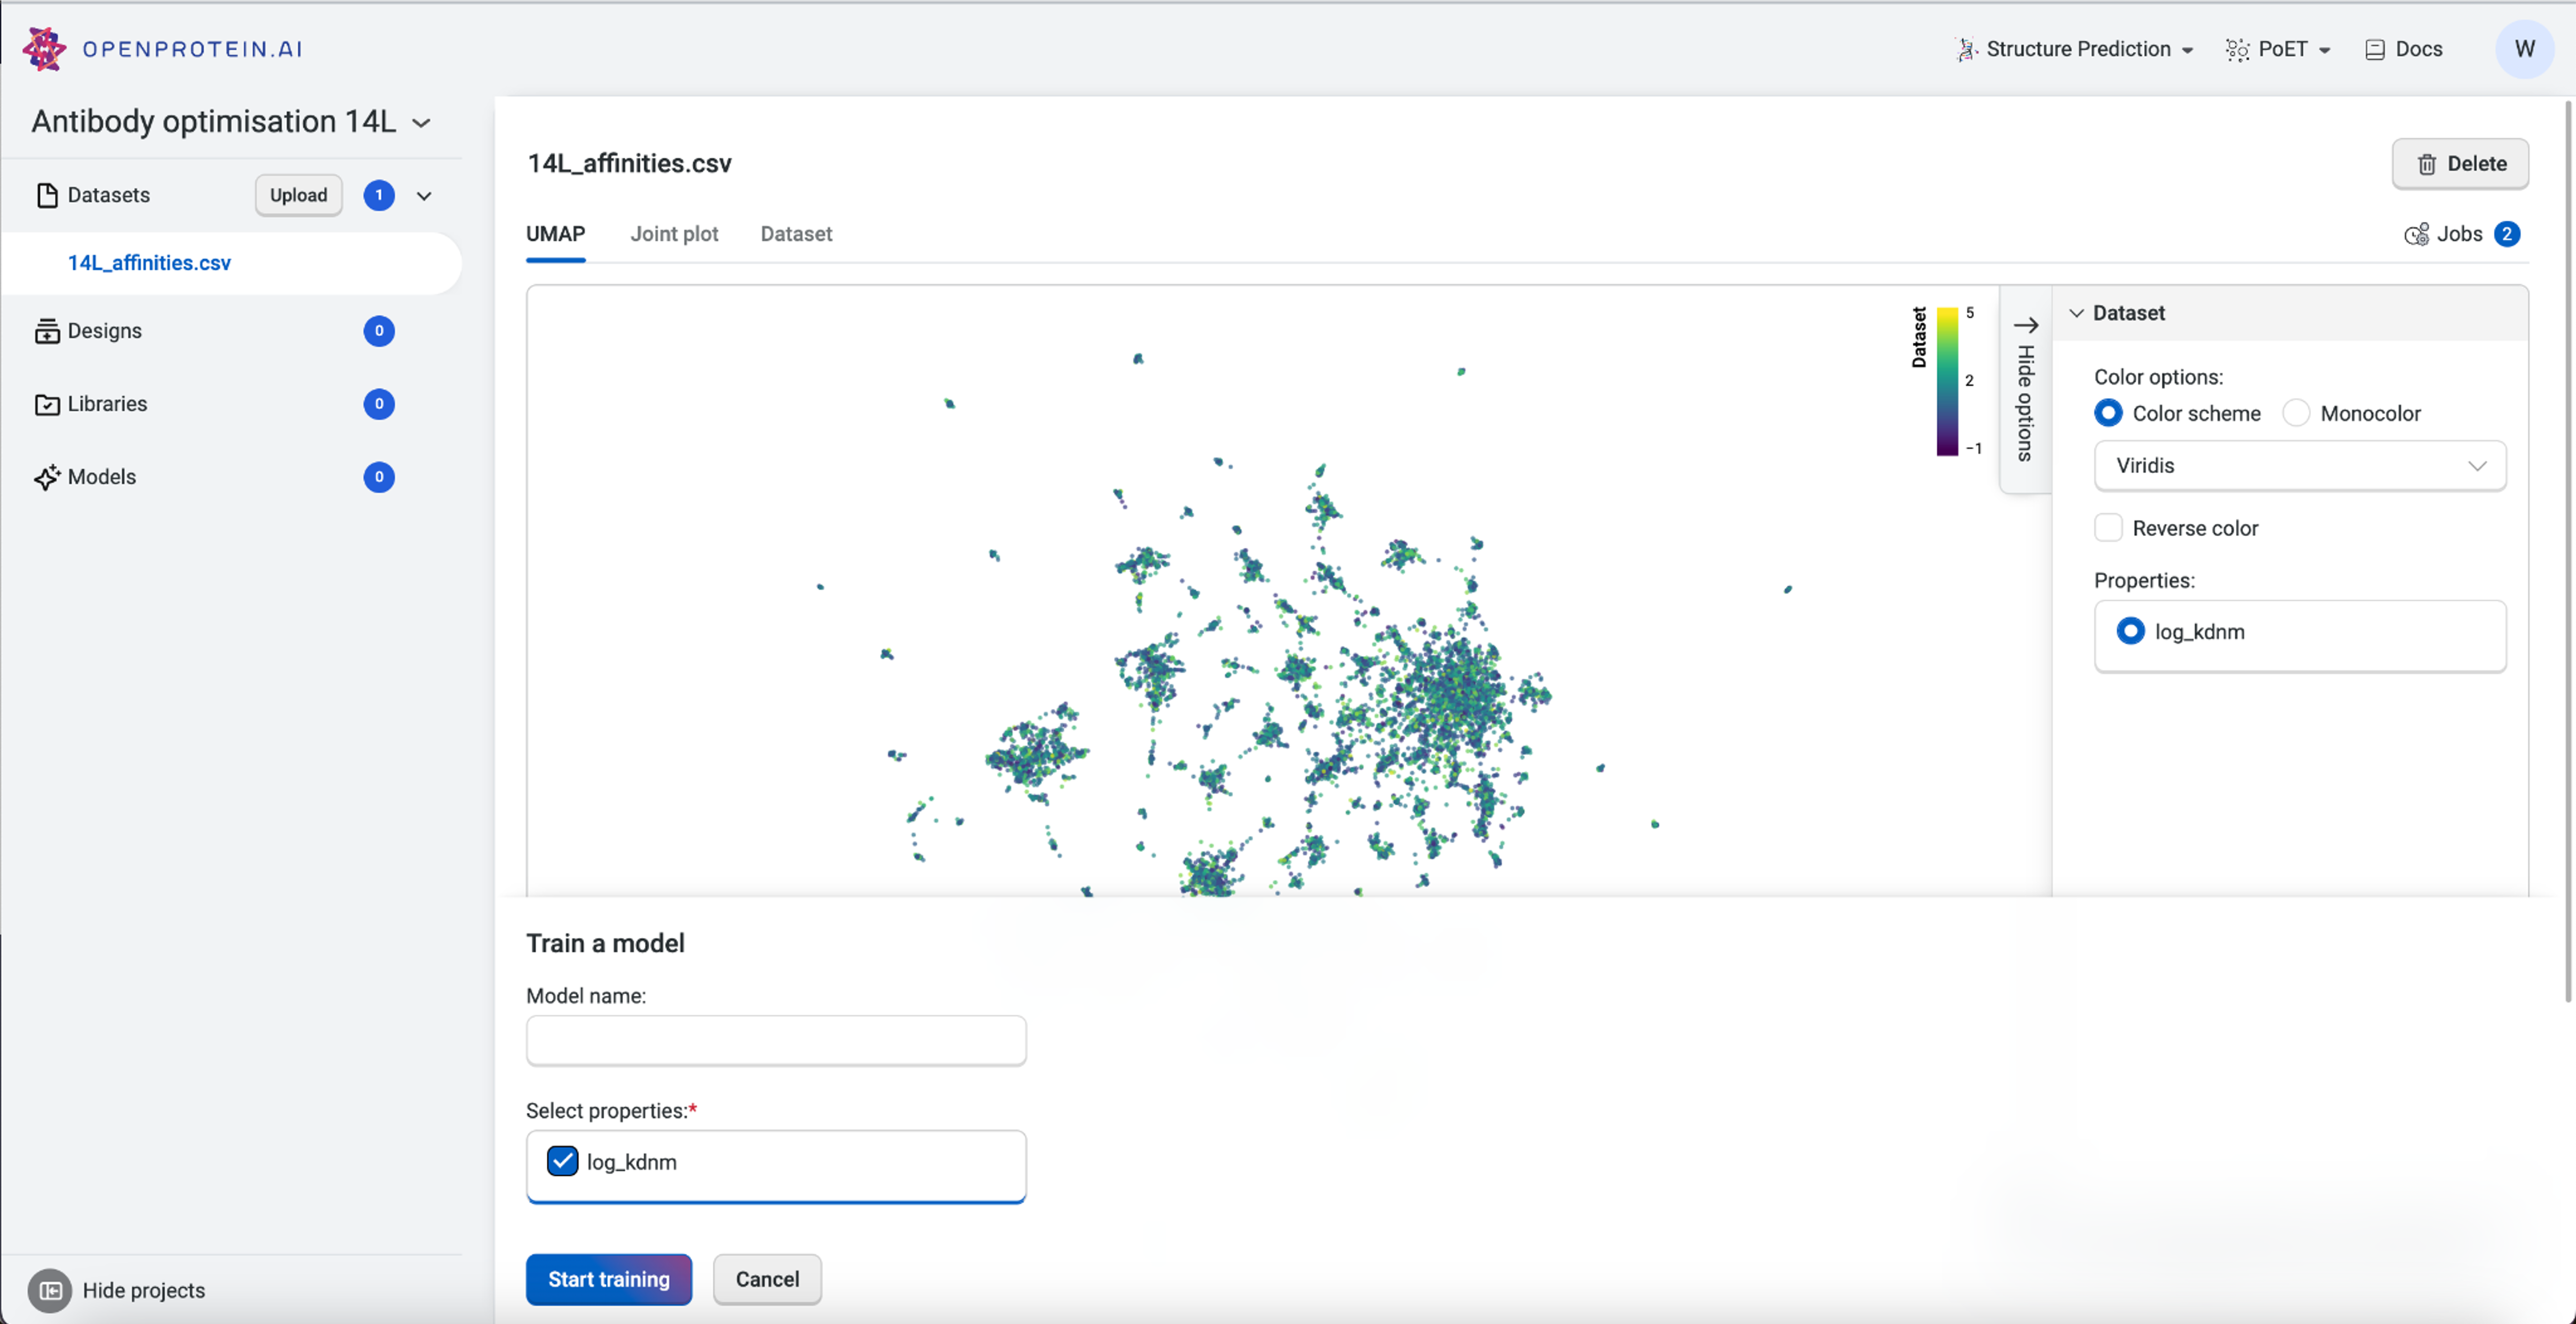
Now that our data is saved in the “Antibody 14L” project, we can visualize it using Uniform Manifold Approximation and Projection (UMAP), joint plots, histograms, and result tables.
The UMAP uses dimensionality reduction to represent many dimensions on a 2D plot, allowing us to analyze the diversity of our starting library.
This dataset has > 15 clusters of differing sizes, indicating that we have a fairly diverse training set. This allows us to build more robust models from a potentially smaller dataset. Don’t worry if your own data doesn’t have similar diversity in variants; OpenProtein.AI can still be used to design variant libraries in an iterative fashion. In the absence of diverse data, consider combining your first ML-designed variant library data with your original data and re-running the whole pipeline to generate a better model with OP Models.
We can tweak the colors as well as explore the different clusters here to create figures for presentation. Dragging the cursor across an area to select a cluster of interest will also highlight the corresponding sequences in the dataset table. The tutorial on Visualizing your data contains more details about other visualization options.
Training our custom model#
Before we can start predicting new antibody variants, we need to train a custom model using our dataset. The custom model allows us to set specific properties of interest, in this case the log Kd measurement, and create a model capable of predicting better binders.
To train the custom model, we first navigate to the dataset we had uploaded and then select Train Model. We’ll select the property “log_kdnm”, then select Start training to initiate the job. Once the job is submitted to the server, the OpenProtein.AI GPUs create a custom model specific to the targeted property. In this example, we are predicting for a better binder against the peptide PDVDLGDISGINAS with OP Models.
After training a model, we can also evaluate the impact of each substitution using Substitution Analysis. This is covered in the tutorial on Substitution Analysis.
Designing our variant library#
We are now ready to design a new variant library. From the Datasets component of our project, we’ll select Create Design.
To demonstrate the power of OpenProtein.AI, we’re going to aim for a low picomolar affinity range by specifying a target affinity that is less than 10 pM. This is a 3-fold improvement over the best binder. Achieving such a low picomolar binder would allow us to better meet the target product profile for most therapeutics. It is possible to set an even lower target, but this might result in variants with a higher number of mutations than is tolerable for the overall antibody structure.
We’ll set the criteria for target less than -2, as the property of this dataset is log Kd. We recommend keeping the default setting for Number of design steps at 25 and Number of sequences per design step at 1024. For this particular first variant library, we will not constrain the Use number of mutations criteria. This will allow us to see how diverse a library the OpenProtein.AI platform is capable of predicting. After selecting Generate design, we’re on our way to having a library of ML designed variants. The platform will start to generate the variant library based on the criteria we provided, and the library should be completed within a few hours of submitting
References#
Lin Li et al. Machine learning optimization of candidate antibodies yields highly diverse sub-nanomolar affinity antibody libraries. Nature Communications, 14(3454):1, june 2023. URL: https://doi.org/10.1038/s41467-023-39022-2.